Do you want to create Christmas decorations in your style this year?
Do you like Nordic minimalism?
Do you want to enjoy the warm warmth of home with the whole family during the holidays?
Involve them in the production of original Christmas decorations!
Paper Christmas ornaments are simple and add a touch of flair to your decor.
Try our great tutorials, and don’t be afraid to be creative!
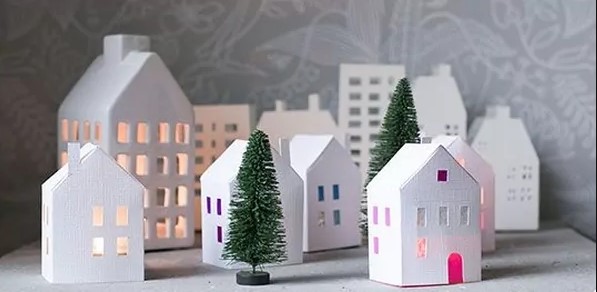
Luminous paper window decorations
Wintertime and the shorter days associated with it directly encourage decorating with luminous decorations. This year, make a picturesque still life on the windowsill that will delight you at home and passers-by outside.
Try these simple Christmas paper window decorations, such as paper houses that conjure up a warm atmosphere during the day and at night.
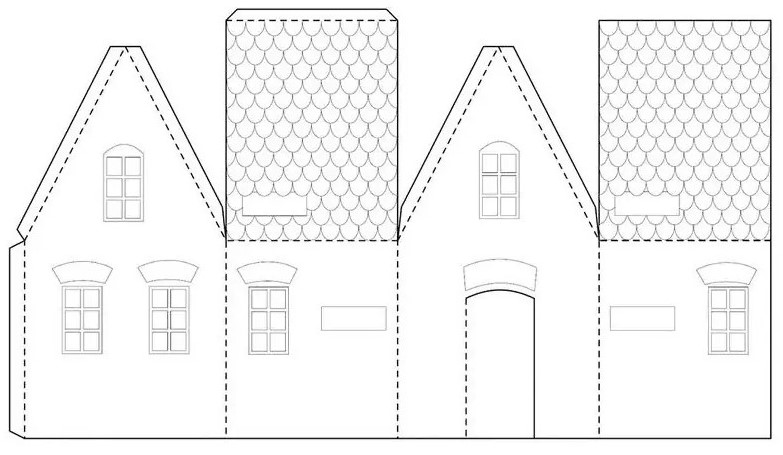
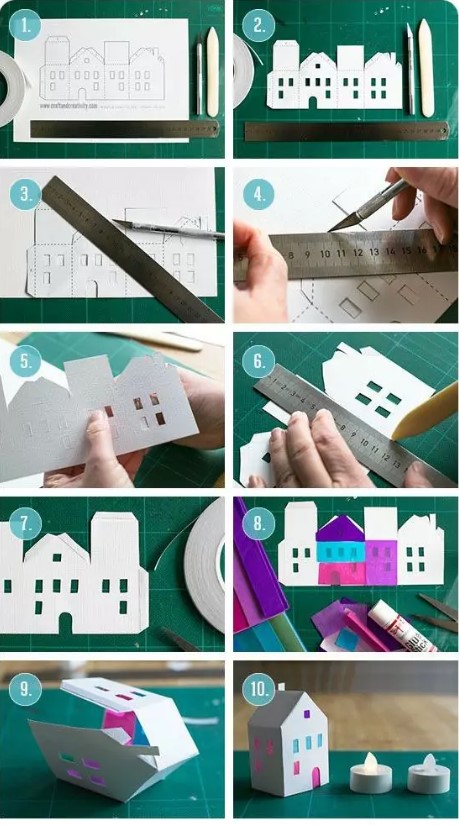
What you will need:
- template for cutting out houses
- paper
- scissors
- sharp knife
- ruler
- paper glue
- colored paper
- Battery-operated candles or string lights
Method:
- Print the house template on white paper.
- Cut it out carefully.
- Using a ruler and the blunt side of a knife, carefully go over all the places where the paper will fold.
- Carefully cut out all the windows and doors using a sharp knife and ruler.
- On the inside of the house, run the blunt side of the knife over all the future bend points.
- Fold the future folds.
- Tape the inside of windows and doors with tissue paper of different colors.
- Fold the house and glue all the bends.
- Place a flashlight candle in the house.
If you want a glowing Christmas village, cut out several houses and illuminate them with flashlights. It’s more practical because you don’t have to turn each house on and off separately.
Do you still feel it is missing something, and would you like to spruce it up? Get inspired by our tips and ideas for Christmas garden decoration!
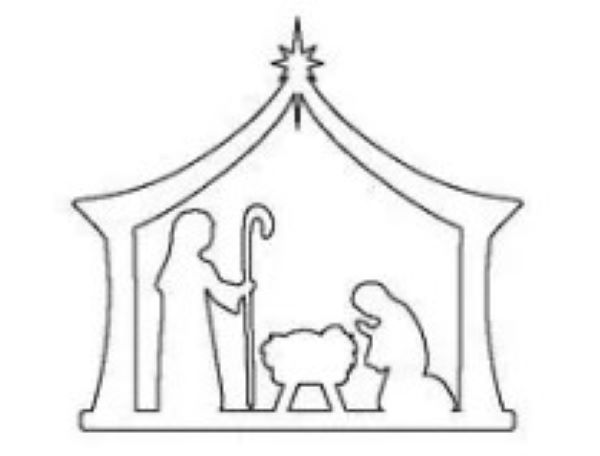
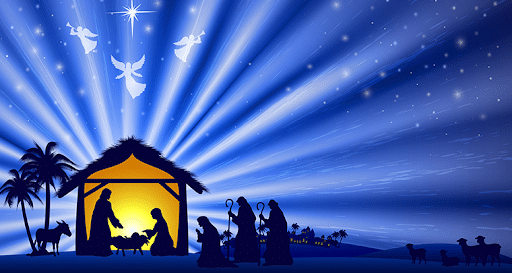
Paper nativity scene
You’d be hard-pressed to find a more quintessential Christmas scene than the silhouette of a nativity scene. Make an impressive paper nativity scene in a simple and clean style and complement it with soft light.
You can create a truly magical still life for the evening by placing it under the Christmas tree or on the windowsill.
What you will need:
- Bethlehem scenery template
- white cardstock paper (can be textured)
- scissors
Method:
- Print or trace the template onto cardstock paper and cut it out carefully.
- You can stick it on the lower edge of the window or place it on the windowsill or under the tree with the light source.

Window Paper decoration
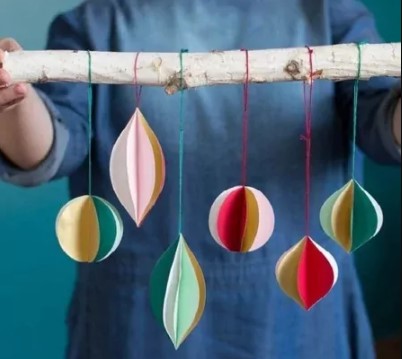
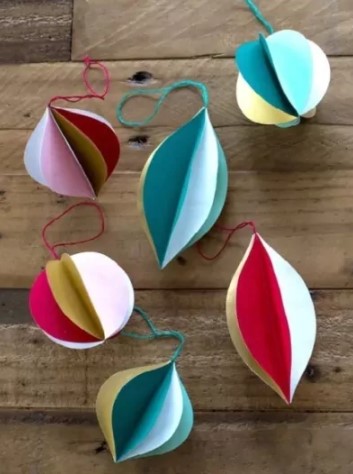
Paper hanging decorations are perfect for the tree, but thanks to their weight, they can also be turned into windows.
Make cheerful Christmas paper window decorations that take just a few minutes, which is impressive whether you choose bright colors or muted shades.
Even children can make paper Christmas decorations and get involved in joint creations from paper!
What will you need:
- colored paper (several colors)
- a pencil
- scissors
- paper glue
- cotton or thread
Method:
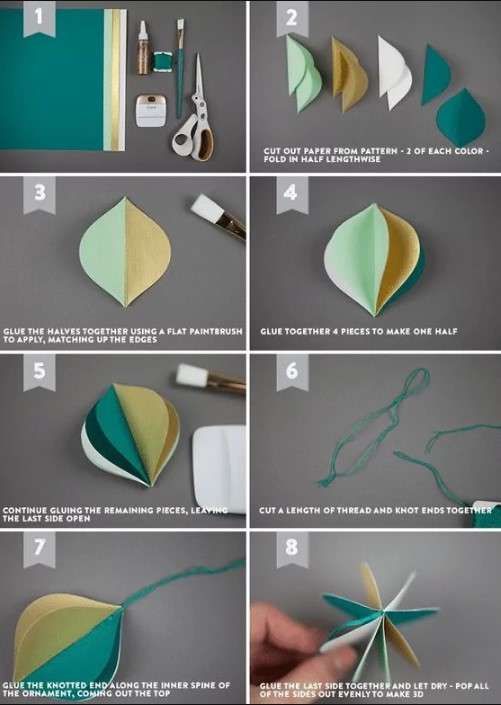
- Draw shapes to cut out on colored paper.
- Circles or drops look best, but you don’t have to fear more demanding shapes.
- Cut out two pieces of each shape. You will need eight pieces in total.
- Fold all the shapes in half and glue them together with one half each time.
- Glue all sides of the shapes so that the same colors are not next to each other.
- Leave the last pair of shapes unglued for now.
- You will insert cotton thread between the last two sides to hang the ornament.
- Cut the cotton, make an eyelet, and tie the ends together on one side.
- Insert the cotton between the last two unglued shapes so the knot is hidden between them.
- Glue the last two sides. Adjust all the parts so that the shape of the ornament is regular.
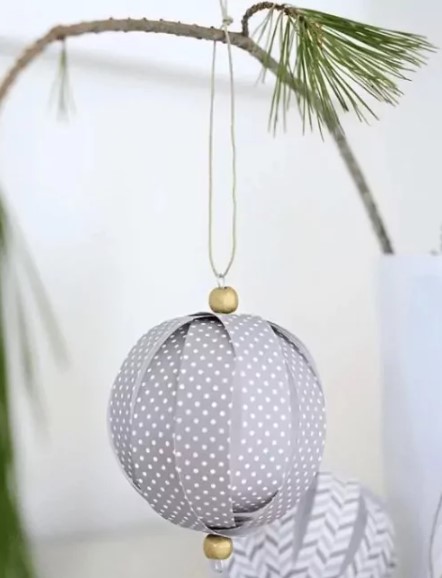
Paper Christmas tree decorations
You will especially appreciate beautiful and simple paper baubles if you have small children who might break the classic ornaments or if you like to change and don’t want to invest in new ornaments every year, which you must store somewhere.
You will love paper Christmas decorations in the shape of balls.
What you will need:
- papers of different colors
- scissors
- a pencil
- ruler
- thin wire
- cutting pliers
- larger beads
- round jewelry pliers (optional)
Method:
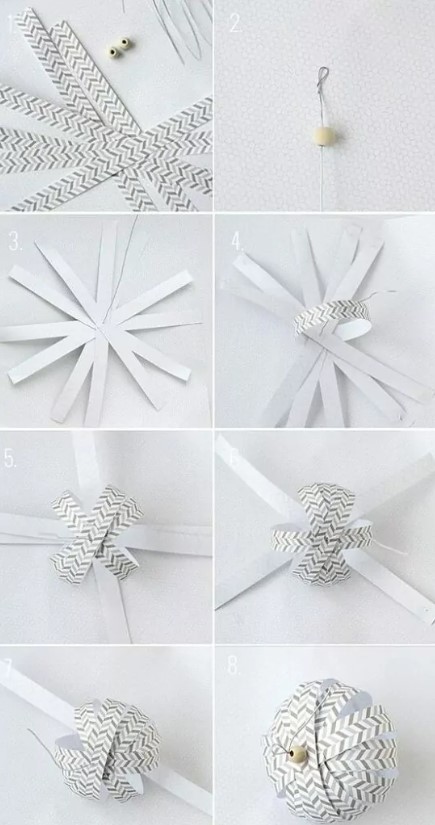
- Cut even strips of colored paper. The longer the stripes, the larger the resulting decoration will be. At the same time, you will need more stripes for larger decorations.
- Make an eyelet at one end of the wire, use round pliers, and string a bead on it.
- Gradually pin all the paper strips onto the wire to thread it through their middle. If you are using patterned paper, place the pattern face down.
- Now, thread all the ends of the paper strips onto the wire to form a ball.
- Put the stripes on the jumper, i.e., all the way around.
- Do the same until the end.
- Reread the bead onto the wire once you’ve threaded the last two strips.
- Behind the bead, make another loop from the wire and fasten the rest.
Discover similar tips

 Milan & Ondra
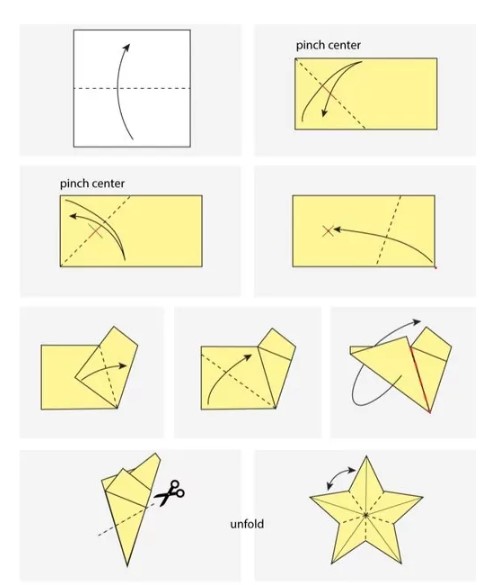
Origami stars
Who does not know the traditional Japanese art of folding paper, called origami? But have you ever thought of using them when preparing Christmas decorations?
Try making stars to decorate your holiday table. You can combine paper stars with soft LED lighting to create original Christmas wall decorations.

What you will need:
- special origami paper or tissue paper
- scissors
- ruler
Method:
Carefully fold the paper according to the instructions below:
Are you wondering how to incorporate origami stars into your holiday table decorations? Get inspired by our tips for Christmas table decoration.
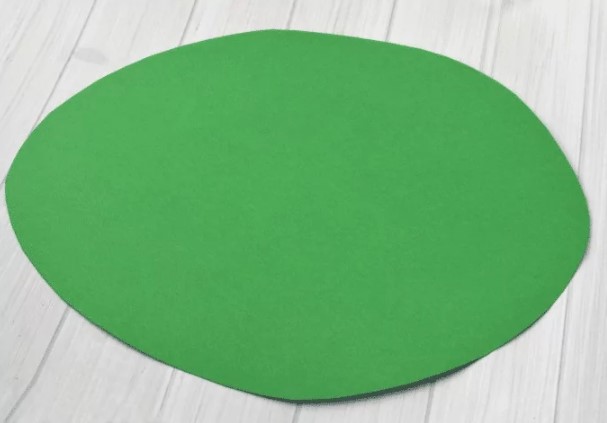
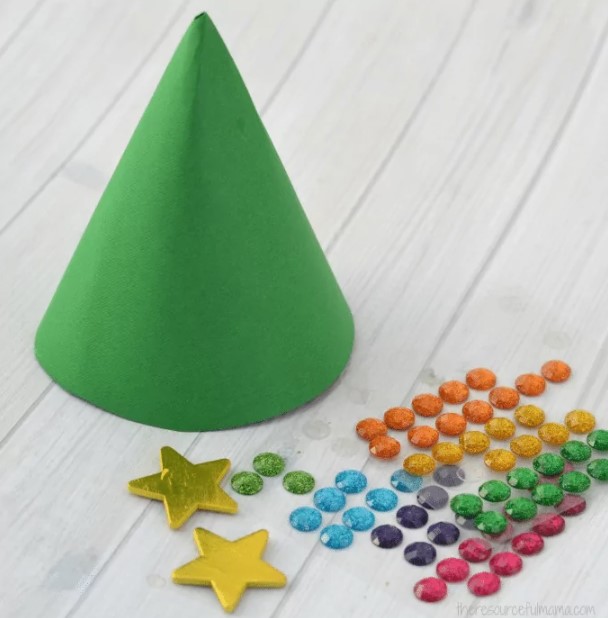
Colorful trees for children
Children love creating with their hands, and Advent is the ideal time for creative activities.
Don’t fear the mess; involve the children in making Christmas decorations.
You will see that they will swell with pride when they look at the self-made paper Christmas tree. And maybe they’ll forget about being angry for a while.
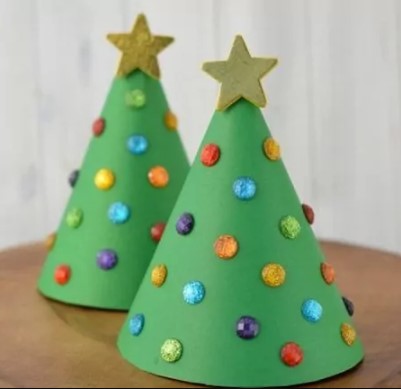
What you will need:
- cardboard green paper
- self-adhesive “gems” in different colors
- self-adhesive stars
- scissors
- paper glue or a stapler
Method:
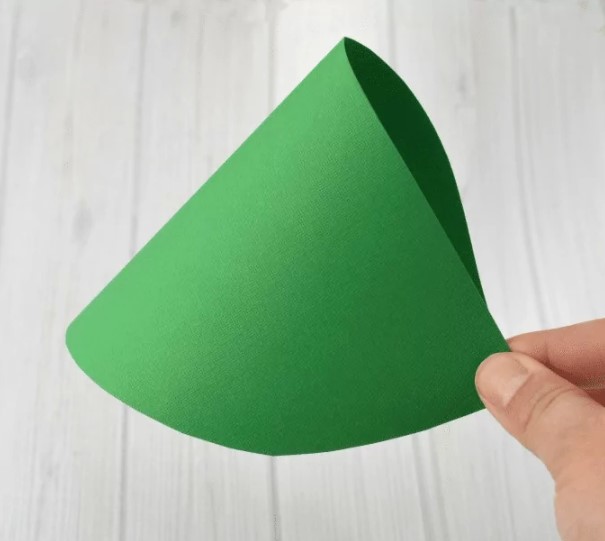
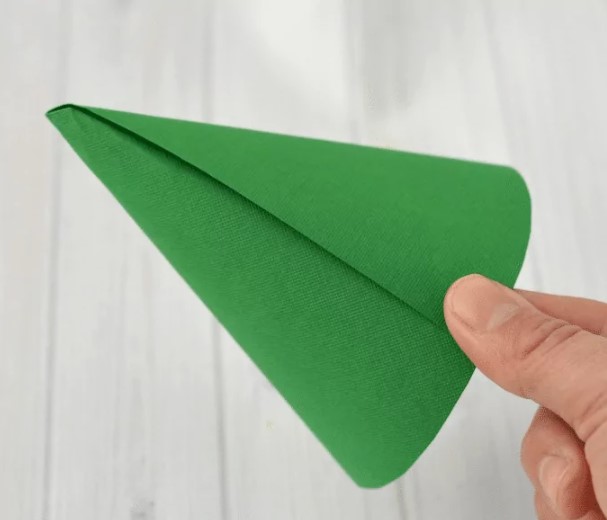
- Cut a circle from the green paper and cut it into two halves.
- Make a cone from half the circle and glue.
- If you want, you can use a stapler.
- Trim the excess ends of the paper if they are sticking out.
- Now, all that remains is the most fun part of the job: sticking a star on the tip of the cone and decorating it.
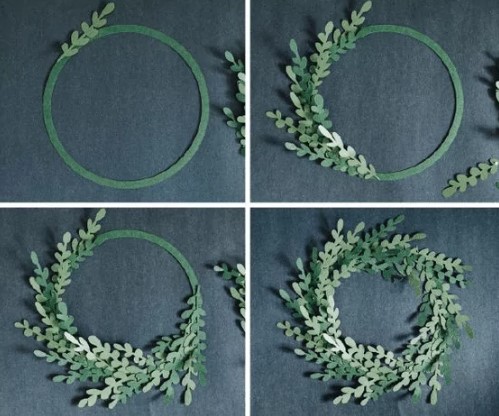
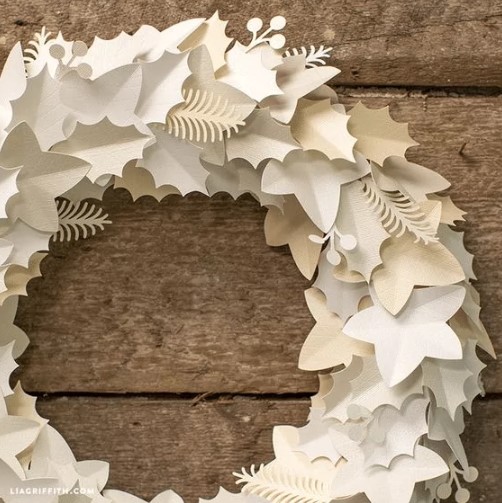
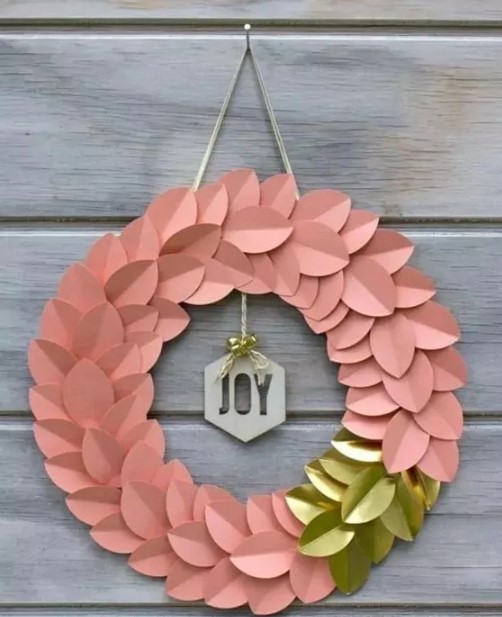
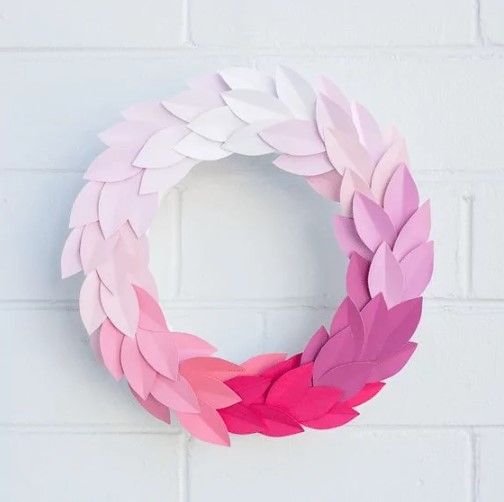
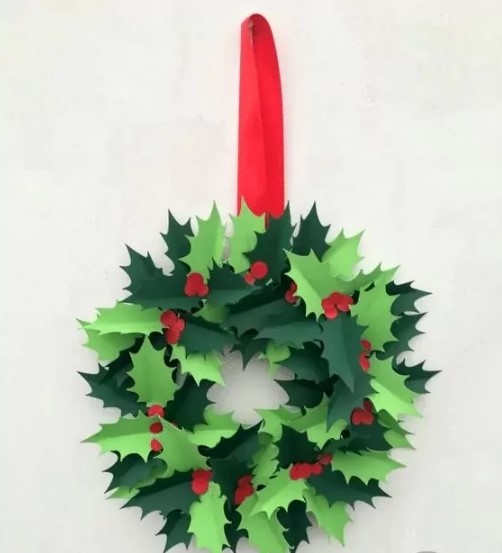
Advent DIY paper wreath
Would you surprise your neighbors with a genuinely original Advent wreath this year? Try making classic Christmas decorations in a nontraditional way—by creating them from paper.
With our instructions, you can easily manage them, and when you play with the colors, the result will be truly captivating.
What you will need:
- colored or white papers
- a pencil
- scissors or a leaf-shaped punch
- cardboard circle
- hot glue gun
Method:
- First, you need a lot of paper tickets. Either draw and cut them out or use a special die.
- Glue the leaves one by one onto a solid circle so that they copy the shape of the circle but at the same time branch out into two sides.
- Continue in the same way until the end.
Do you prefer classics on the table? Make an Advent wreath according to our instructions.
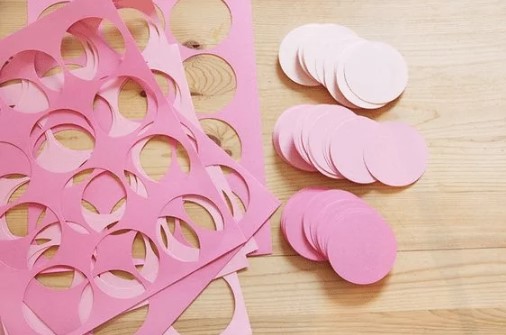
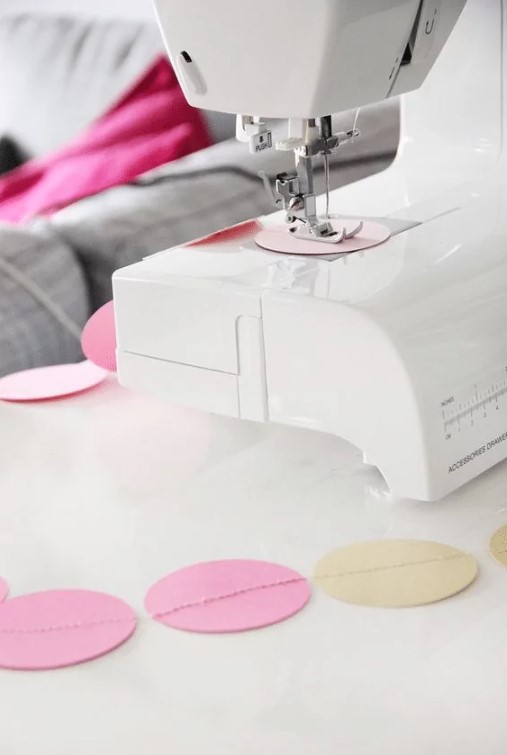
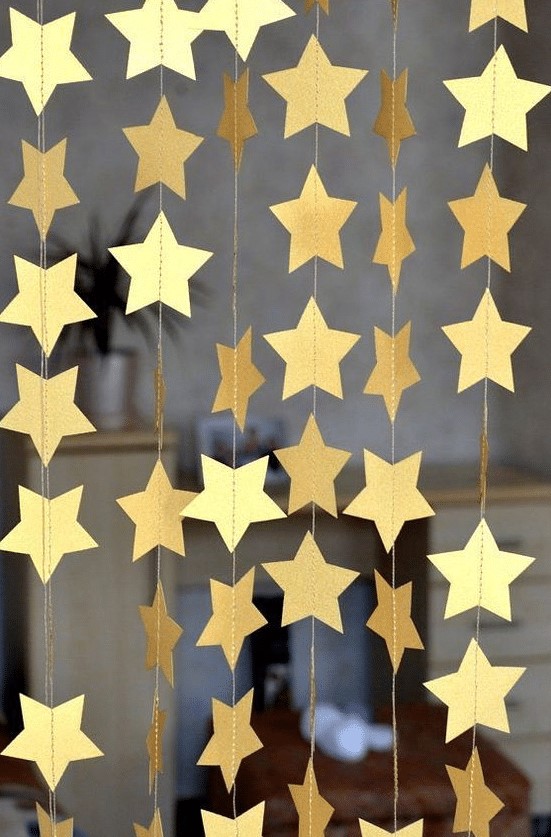
Decorating Paper chain (not only for the tree)
Forget the chains from paper rings you made in elementary school for a moment. A modern paper chain in the Scandinavian style looks excellent and will be cozy, even with an otherwise minimalist interior.
What you will need:
- metallic paper
- a pencil
- scissors
- compass or circle punch (purchased at Creative Supplies)
- sewing machine
Method:
Making a modern paper garland is simple. You can connect the chain parts with the stapler or the sewing machine.
Cut out many circles from metallic paper and sew them together to form a chain.
You can also use other shapes, such as stars or hearts.

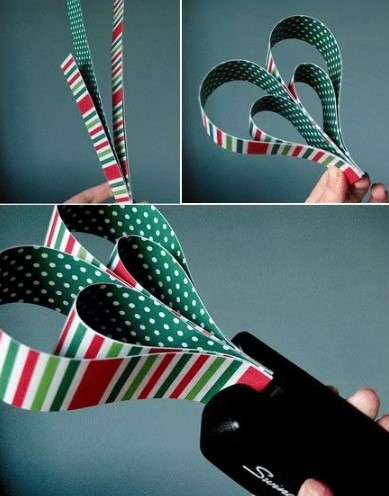
Christmas paper hearts
With leftover colored paper, create paper hearts to decorate your tree or table in a fun DIY project that can be done with children.
What will you need:

- colored or patterned papers (can also be various scraps)
- pencil
- ruler
- scissors
- stapler
- cotton
Method:
- Cut strips of different lengths but the same width from colored papers.
- You should have two pieces from each length (on either side of the heart).
- Fold the individual strips two at a time to form a heart shape.
- Start with the shortest and add longer ones.
- Staple all the stripes together at the bottom of the heart.
- Now that you’ve made your paper Christmas ornaments in the shape of hearts, all that remains is to tie the cotton thread to hang them up.
We often associate paper Christmas decorations with our childhood, when we made them at school or home. Try actively engaging in their production again; almost anything can be made from paper.
 Recipes
 Sweet Recipes
 Savory recipes
 Inspiration
 Decorations DIY
 Traditions & inspiration
 Christmas in Europe
 Christmas in the world
 Wishes
 Christmas wishes
 New Year wishes
 Christmas markets in Europe
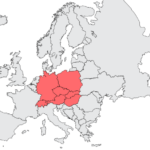 Central Europe
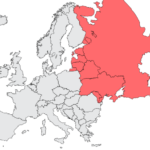 Eastern Europe
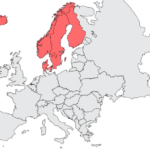 Northern Europe
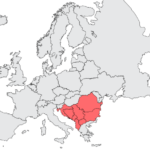 Southeast Europe
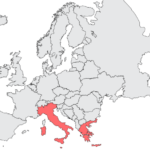 Southern Europe
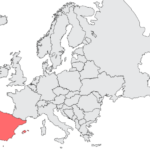 Southwestern Europe
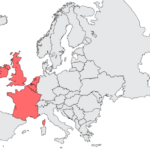 Western Europe