Nothing captures the magic of Christmas quite like the sweet scent of holiday cookies baking in the kitchen.
Whether you’re seeking a crowd-pleasing recipe for a cookie swap, the perfect treats for Santa, or simply a batch to share with your family, we have plenty of ideas to inspire you. Some recipes require time in the oven, while others don’t, but each one is sure to warm hearts and create cherished memories.
Read on for our list of Grandma-approved Christmas cookies.
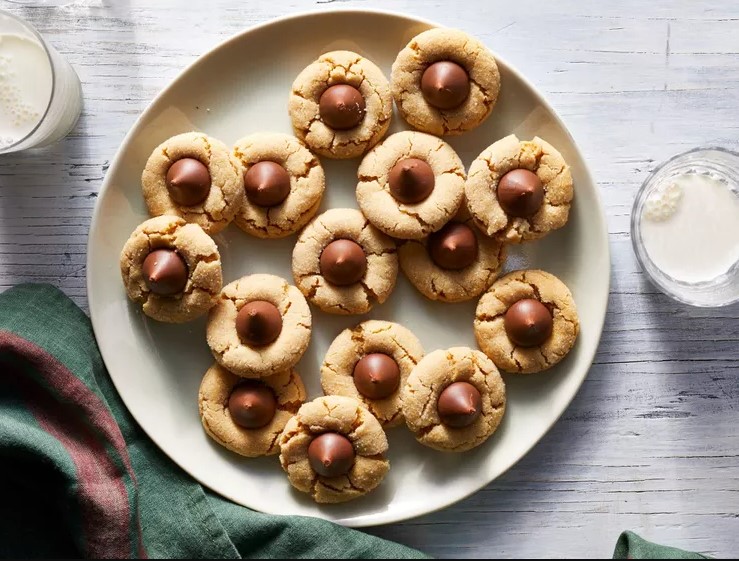
Peanut Butter Kiss Cookies
Kisses make cookies sweeter. These Hershey’s Kisses cookies are among our favorite recipes for that very reason.
With its delicious ingredients and irresistible results, this peanut butter kiss cookie recipe almost seems too good to be true.
But trust us: These decadent and easy peanut butter cookies with Hershey’s Kisses are very real.
Ingredients:
- 1/2 cup vegetable shortening (you can substitute for butter, but the texture of the cookie may be affected)
- 1/2 cup creamy peanut butter
- 1/2 cup packed light brown sugar
- 3/4 cup granulated sugar, divided
- 1 large egg
- 36 milk chocolate kisses
- 1 tsp. baking soda
- 1/2 tsp. salt
- 2 Tbsp. whole milk
- 1 tsp. vanilla extract
- 1 3/4 cups (about 7 1/2 oz.) all-purpose flour
Method:
- Preheat oven to 375°F. Line a baking sheet with parchment paper.
- Beat shortening and peanut butter with a stand mixer fitted with a paddle attachment on medium speed until smooth, about 1 minute.
- Gradually add brown sugar and 1/2 cup of the granulated sugar, beating until light and fluffy, about 2 minutes.
- Add egg, milk, and vanilla; beat on medium-high speed until fully combined and fluffy, about 1 minute.
- Stir together flour and baking soda in a large bowl; add to shortening mixture, beating on low speed until fully combined, about 1 minute.
- Roll dough into 36 (1-inch) balls.
- Place remaining 1/4 cup granulated sugar in a bowl; roll balls in sugar to coat.
- Arrange 12 of the dough balls on a prepared baking sheet spaced 2 inches apart.
- Bake in preheated oven for 8 minutes. Remove from oven; immediately press 1 chocolate kiss into the center of each cookie.
- Return to oven; bake at 375°F until lightly browned, about 2 minutes. Remove from oven; cool on a baking sheet for 3 minutes.
- Transfer cookies to a wire rack. Repeat the process 2 times with the remaining 24 balls and chocolate kisses. Let cookies cool completely on a wire rack for about 20 minutes.
To switch up these beloved cookies, consider these variations:
- Up the chocolate: Change up the peanut butter cookie base for a chocolate.
- Add crunch: Add chopped nuts or swap in chunky peanut butter for extra crunch.
- Drizzle: For a sophisticated touch, top the cookies with a drizzle of melted dark chocolate.
- Add spice: Roll the cookie dough in cinnamon sugar for extra spice.
- Switch up the kisses: Top the cookies with a variety of flavored kisses for a festive presentation.
- Other candies: Mix it up by topping some (or all) of the cookies with other types of candies, including caramels and truffles.
Peanut butter kiss cookies can be stored in an airtight container at room temperature (stacked between layers of parchment paper if needed) for up to five days or frozen for up to two months for longer storage. They should be brought to room temperature before serving.
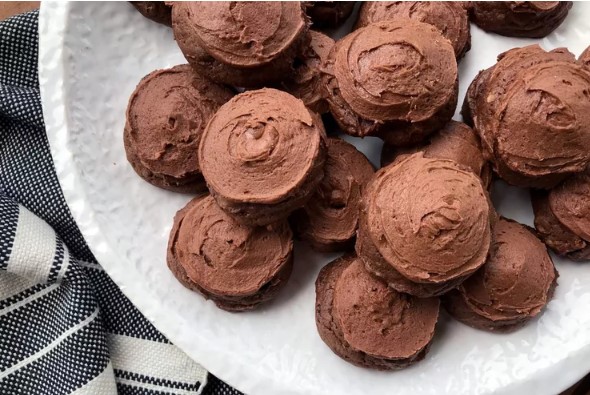
Grandma’s Chocolate Drop Cookies
These chocolate drop cookies are straight from Grandma’s recipe box but don’t require her wealth of baking expertise to make yourself.
Drop cookies, made from soft dough and dropped onto a baking sheet in balls, are a simple, old-fashioned treat prime for personalization.
If you like nuts, add them in.
Do you prefer mint chocolate chips to semi-sweet chips? Feel free to substitute.
No matter what you add, you’ll end up with a soft, cake-like cookie that packs on the chocolate flavor. Plus, once you pile on the chocolate icing, having just one is nearly impossible.
Ingredients:
Cookie Dough:
- 1/2 cup shortening
- 1 egg
- 1 cup sugar
- 1 teaspoon vanilla
- 1/2 teaspoon baking soda
- 1/2 cup cocoa
- 1 3/4 cups flour
- 1/2 teaspoon salt
- 1 – 2 cups semi-sweet chocolate chips
- 1 cup nuts (optional)
- 3/4 cup buttermilk
Frosting:
- 1/4 cup butter, softened
- 2 ounces cream cheese, softened
- 1 teaspoon vanilla
- 2 tablespoons cocoa
- 1 1/4 cups powdered sugar
- 1 tablespoon milk
Method:
Make the cookies:
- Mix shortening, sugar, and egg thoroughly. Stir in buttermilk and vanilla.
- Sift in dry ingredients and stir. Stir in chocolate chips and nuts if desired.
- Drop cookies onto prepared baking sheets using a tablespoon cookie scoop.
- Space cookies 2 inches apart. Bake for 8-10 minutes at 375°.
Make the frosting:
- Cream together cream cheese and butter.
- Add vanilla and cocoa. Beat until smooth.
- Add powdered sugar and mix until smooth.
- Add milk, adding more if needed for desired consistency. Spread frosting over cookies once completely cooled.
Try using a tablespoon cookie scoop to drop the cookies on your baking sheet. Not only will it help keep your fingers clean, but it will also make sure your cookies come out even.
Our grandmothers often used lard instead of butter when baking. Try these unconventional recipes for Lard Christmas Candy!
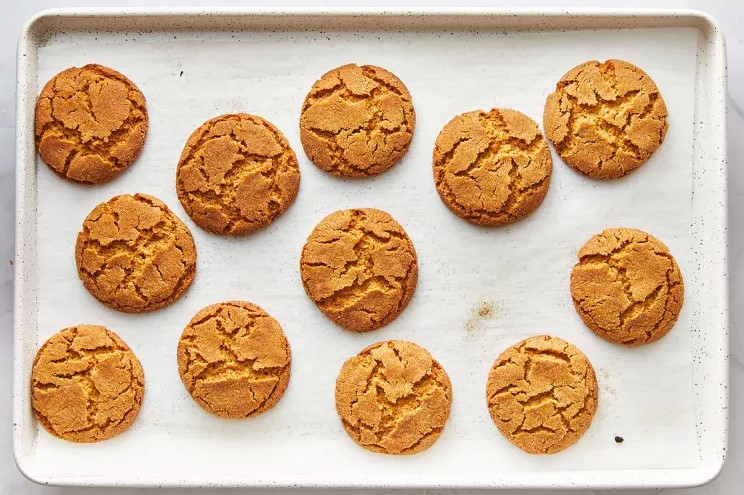
Gingersnap Cookies
With their bold spice hit and snappy texture, these easy treats are destined to become a holiday favorite.
Baking a batch of our gingersnap cookies fills your whole house with the fragrance of warm spices, conjuring the holiday spirit like nothing else.
These cookies are seriously beautiful—perfectly round, with a lovely crinkled top—and seriously easy to make. Just whip up the dough, roll it into balls, toss them in cinnamon sugar, and bake.
No dough chilling is required, so the cookies are ready from start to finish in only 35 minutes.
Perfect with a cup of hot tea or a glass of milk, these cookies are sure to generate smiles and help you create new holiday memories and traditions.
Ingredients:
- 6 Tbsp. unsalted butter, softened
- 6 Tbsp. shortening
- 1 cup plus 3 Tbsp. granulated sugar, divided
- 1 large egg
- 1/3 cup sorghum syrup or molasses
- 2 1/3 cups all-purpose flour (10 1/2 oz.)
- 2 1/2 tsp. ground ginger
- 1 1/4 tsp. ground cinnamon, divided
- 1/2 tsp. table salt
- 2 tsp. baking soda
Method:
- Preheat the oven to 350°F, with one rack in the upper third and one rack in the lower third.
- Line 2 sheet pans or baking sheets with parchment paper.
- Combine butter and shortening in a large bowl; beat with an electric mixer at medium speed until combined, about 30 seconds.
- Add 1 cup sugar; beat at medium speed until fluffy, about 2 minutes. Add egg; beat at medium speed until well blended, about 1 minute.
- Add syrup; beat until thoroughly combined, 30 seconds to 1 minute.
- Whisk together flour, ginger, baking soda, ½ teaspoon cinnamon, and salt in a medium bowl.
- Add flour mixture to butter mixture; beat at low speed until just combined.
- Combine the remaining 3 tablespoons of sugar and ¾ teaspoon cinnamon in a small bowl.
- Scoop dough with a 1 ½-tablespoon cookie scoop, rolling into a ball.
- Roll the dough ball in cinnamon sugar and arrange it on the prepared pan.
- Repeat with remaining dough and cinnamon sugar to yield 25 dough balls (12 on one pan and 13 on the other).
- Bake at 350°F until lightly browned around the edges, 15 to 17 minutes, rotating pans after 8 minutes. Cool cookies on pans for 2 minutes; remove cookies to a wire rack to cool completely.
Discover more recipes
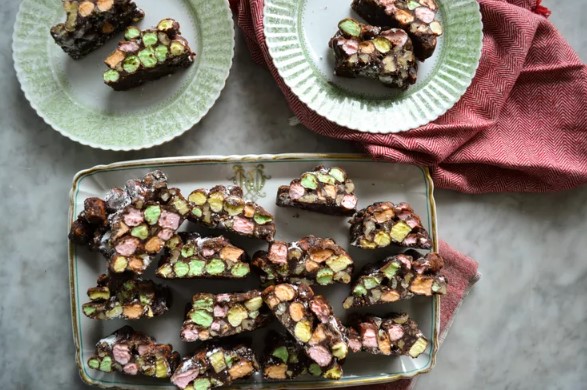
Cathedral Window Cookies
Do you remember those cookies that some people call Cathedral Cookies and others know as Stained-Glass Cookies?
You might have had them at a church Christmas potluck or at your grandmother’s house.
These no-bake Christmas cookies are perfect for keeping the kids entertained during the holiday break. They’re super easy to make, and even the busiest holiday hostess can manage them.
While you take care of melting the butter and chocolate on the stovetop, the kids can have fun pouring the marshmallows and nuts into a big bowl. Let them mix the chocolate and marshmallow mixtures together and shape the rolls for a fun afternoon of “baking.”
The only thing to keep in mind when making these Cathedral Cookies is that they need some time in the refrigerator to firm up before serving. This actually makes them a great make-ahead dessert for potlucks and bake sales.
Once the rolls are set, cutting them into slices reveals their colorful interior, which resembles stained-glass windows in cathedrals and churches.
This no-bake holiday recipe makes a lot of cookies, so be ready to share them with a crowd or bring some to your neighbors.
Enjoy!
Ingredients:
- 1 12-oz package of semi-sweet chocolate pieces
- 4 tablespoons butter
- 2 eggs, beaten
- 1 10-oz bag Mini Funmallows Marshmallows
- 1 1/2 cups chopped walnuts or pecans
- Confectioner’s Sugar
Method:
- Melt Chocolate and butter over low heat.
- Remove from heat, add eggs, mix well, and allow to cool slightly.
- Mix marshmallows and nuts in a large bowl.
- Pour the chocolate mixture over the marshmallows and nuts and mix well.
- Shape the mixture into four rolls approximately 8 inches long on parchment or wax paper sprinkled with confectioner’s sugar.
- Chill for several hours until firm, and slice to serve.
Tips for Making Cathedral Window Cookies with Kids:
To successfully make Cathedral Window Cookies with kids, melt the chocolate before calling the kids into the kitchen.
Your kids can mix all the ingredients together in a large bowl. We shape these marshmallow cookies into logs to get a lovely windowpane effect when sliced; if you want to make individual sweets, dollop the mixture into small, praline-style mounds.
Ginger cookies come in various forms; get inspired by different ginger Christmas cookie recipes.
Lemon Thumbprint Cookies
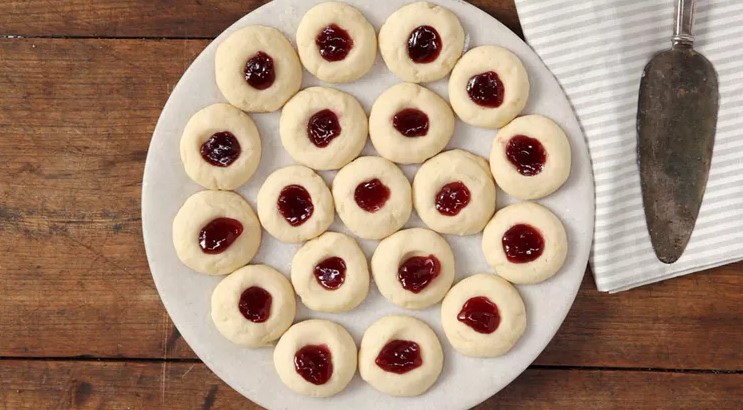
Our buttery Lemon Thumbprint Cookies, with raspberry jam on lemony cookies, are sure to earn rave reviews.
Baking cookies during the holidays is our favorite. We love the aroma of crackles, gingerbread, Linzer, and shortbread cookies wafting from our oven.
Sweet and tangy flavor combos are hard to beat. Adding dollops of fruity raspberry preserves to lemony cookies will bring in rave reviews at every holiday party, potluck, or swap. They’re simple to make and fun to decorate – just roll cookie dough into balls, then indent them with your thumb (or a spoon!) to create space for a spoonful of delicious filling. These lemon thumbprint cookies deserve to be filling up your Christmas cookie tins and jars all season long. These cute thumbprints dazzle on the dessert table and on the taste buds.
Ingredients:
- 1 cup butter, softened
- 1 cup powdered sugar
- 1 cup granulated sugar
- 2 large eggs
- 1 cup vegetable oil
- 1/4 cup fresh lemon juice
- 5 1/4 all-purpose flour
- 1 teaspoon cream of tartar
- 1 teaspoon baking soda
- 1/4 teaspoon salt
- 1 teaspoon grated lemon rind
- 3/4 cup plus 2 tablespoons raspberry jam
Method:
- Beat butter at medium speed with an electric mixer until fluffy; add powdered and granulated sugars, beating well.
- Add eggs, oil, and lemon juice, beating until blended.
- Combine flour and the next 4 ingredients; gradually add to the sugar mixture, beating until blended.
- Shape dough into 1-inch balls and place about 2 inches apart on lightly greased baking sheets. Press the thumb in the center of each cookie to make an indentation.
- Bake, in batches, at 350°F for 9 to 11 minutes or until set. (Do not brown.) Remove the cookies and put them on wire racks to cool. Spoon 1/2 teaspoon raspberry jam in each indentation.
Cherry Winks
This cookie takes us back to the 1950s and gained popularity as the winning recipe for a national Pillsbury baking contest.
The outer layer is coated in cornflakes, a popular ingredient at the time that adds a unique texture to the standard cookie dough. Inside, the cookies have a tender crumb with a combination of fruits (dates and cherries) and nuts (pecans), similar to a fruit cake.
The real star of these cookies is the maraschino cherries, which provide a sweet balance to the crunchy cereal coating and add a colorful touch to each sweet.
It’s important not to skimp on them, as cookies without enough cherries can end up surprisingly bland (trust us on this).
Also, if your cookies need an extra minute or two in the oven, be sure to keep a close watch to prevent the cereal from burning.
Ingredients:
- 2 ⅓ cups flour
- ½ teaspoon kosher salt
- 2 teaspoons baking powder
- 10 tablespoons unsalted butter, softened
- 1 cup sugar
- 2 tablespoons whole milk
- 2 eggs, room temperature
- 1 teaspoon vanilla extract
- ½ cup maraschino cherries, patted dry and chopped, plus 8 to 10 more quartered for the cookie tops
- 14 dates, finely chopped
- ¾ cup toasted pecans, chopped
- 2 ½ cups lightly crushed cornflakes
Method:
- Heat the oven to 375°F, and line two baking sheets with parchment paper.
- Whisk together the flour, baking powder, and salt in a medium bowl.
- Cream the butter and sugar in the bowl of a stand mixer set at medium speed until light and fluffy.
- Add the milk and blend well. Add the eggs, blending between each, then mix in the vanilla.
- Add the flour mixture, a quarter-cup at a time, until all the flour is well mixed. Stop the mixer. Use a spatula to fold in 1/2 cup chopped cherries, dates, and pecans.
- Spoon the dough into tablespoon-sized portions and roll in the cornflakes. Arrange on a baking sheet 2 inches apart. Press a quartered cherry into the top of each cookie.
- Bake the cookies until set, about 12 minutes. Transfer to a rack to cool completely. Repeat with the shaping, rolling, and baking steps with the remaining dough.

Christmas baking, according to our grandmothers
In most families, Christmas cookie recipes are often passed down from generation to generation as part of a family secret. And even if we try many different types of Christmas pastries in the course of our lives, nothing can beat the one we associate with our childhood.
If you are also a classic lover, you can try recipes for forgotten Christmas cookies inspired by the cookbooks of our grandmothers and great-grandmothers. These cookies are often very simple candies made of a few basic ingredients, the taste of which will take you back several decades. We always have most of the ingredients at home; you just need to know how to combine them correctly and, above all, bake with love.

 Milan & Ondra

 Central Europe
 Eastern Europe
 Northern Europe
 Southeast Europe
 Southern Europe
 Southwestern Europe
 Western Europe